

If you want to transfer photos from iPhone to a laptop there are many ways to do it. High-resolution pictures and videos can take up a lot of space on the iPhone and it becomes necessary to transfer the photos from your iPhone to your personal computer.
Table of Contents
Transfer photos from iPhone to Mac in macOS Catalina and more:
If you have an old MacBook, you can simply use the photo transfer feature to do the task. But this method can’t be used for the latest versions like Catalina, Monterey, and Big Sur. The right method for transferring photos is listed below:
- Use a USB cable to connect the iPhone to the MacBook.
- Open Dock and use spotlight searches to find the Photos app on your Mac. Alternatively, you can open the Applications folder and choose the Photos app.
Now on the left side of the pictures page, the iPhone will already be selected. You can also select the iPhone if it’s not already selected.
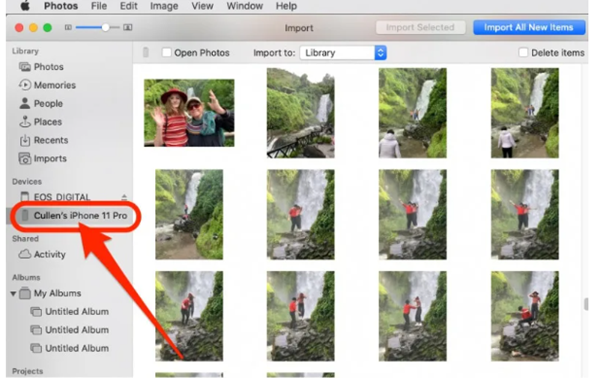
- Now choose and select the pictures you want to import.
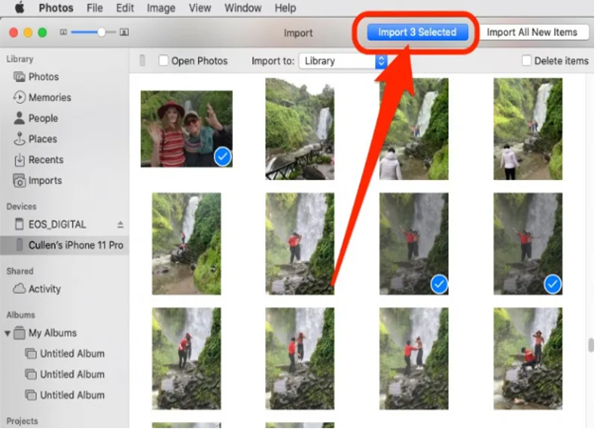
- Select the import button. It is placed at the top of the page.
That concludes the process; Finder has made it simple! Learn how to transfer photographs from iPhone to Mac without a USB cable using AirDrop or iCloud Photo Stream if that’s what you like to do. These techniques are especially useful if you have a MacBook without built-in USB-A ports!
Transfer photos from iPhone to Mac in macOS Mojave:
This method is specifically mentioned for the people who use the macOS Mojave operating system. Also, if your MacBook has the newest version of macOS we recommend you keep it updated. This ensures that privacy updates, bug fixes, and you get access to many new features.
- Use a USB cable to connect the iPhone to the MacBook.
- Open Dock and use spotlight searches to find the Photos app on your Mac. Alternatively, you can open the Applications folder and choose the Photos app.
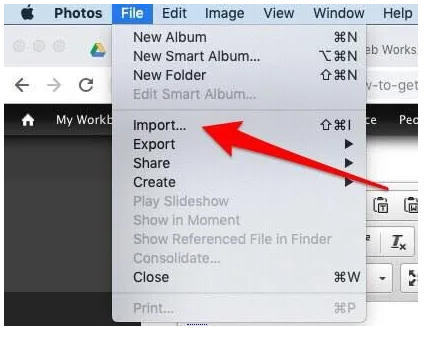
- Click on the file and select import from the menu.
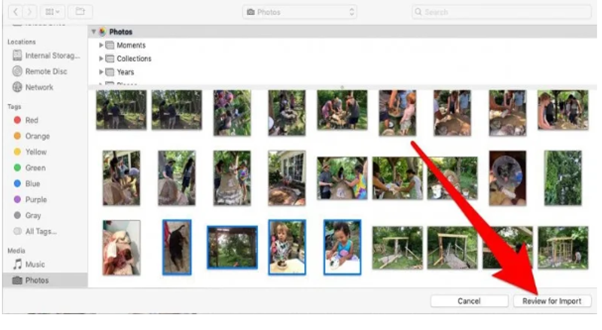
- Now to download the selected photos hold down the command key and select the photos you want to import by clicking Import New Photo.
- If you already imported the selected photos, MacBook would let you know. Now you will have the option to import the rest of the pictures.
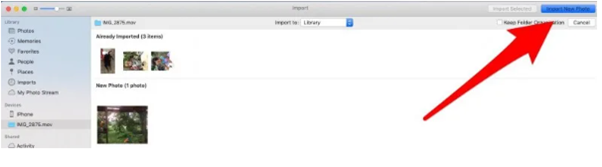
- If you have not backed your photos before, it means that you will prefer importing all the photos.

- Choose Last import to go through the pictures you have recently imported.
Transfer photos from iPhone to Mac or MacBook with iCloud Photo Stream:
This is an alternative way to import pictures without using a cable. It is more convenient, and the chances of the error are extremely low. Here, the important point is that the photo stream doesn’t occupy a lot of space in the iCloud Storage package. You need to turn the Wi-fi or the mobile data on and then set up the Photo Stream to start the process of photo transfer. Enable the app on your Mac and iPhone then follow the steps given below.
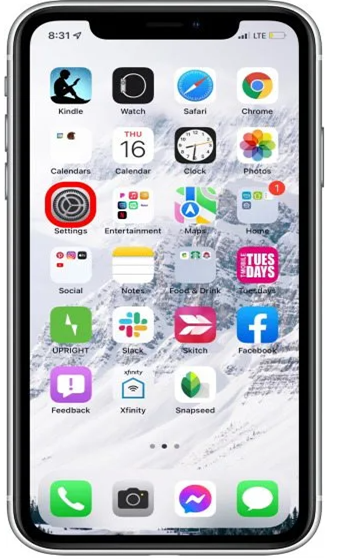
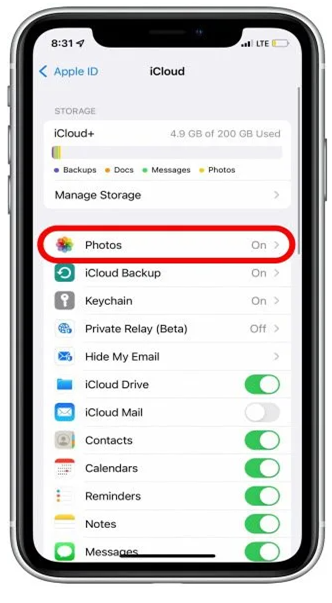
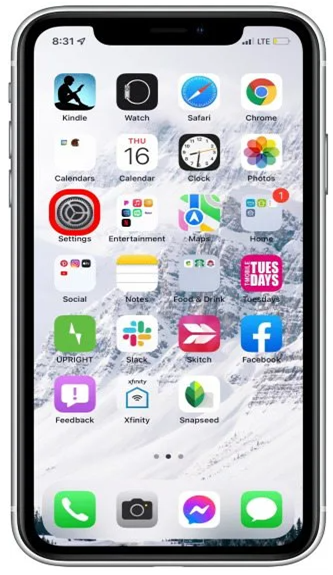
- Unlock your iPhone and open the settings.
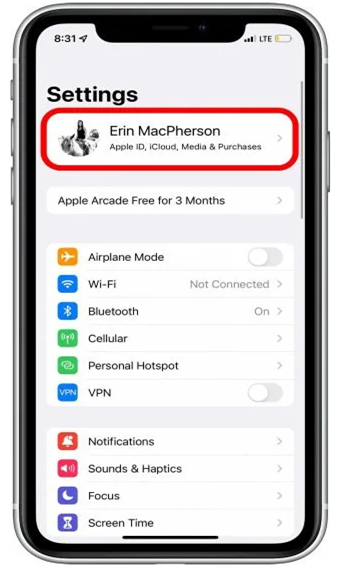
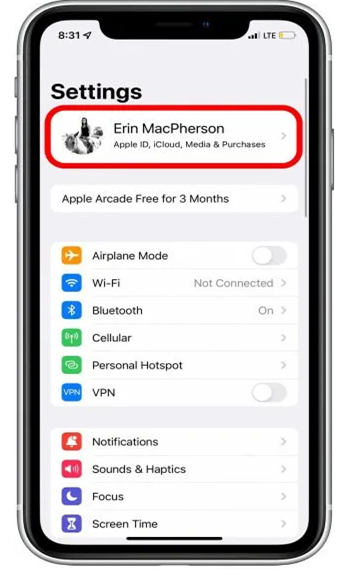
- Click your Apple ID profile present at the top of the screen.
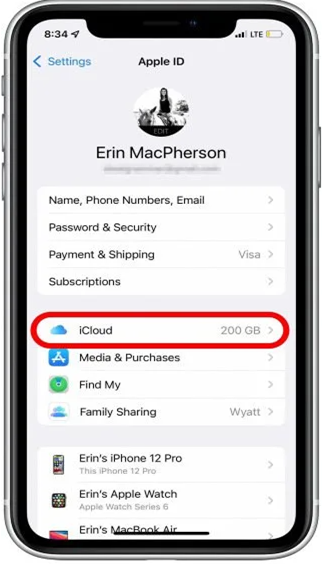
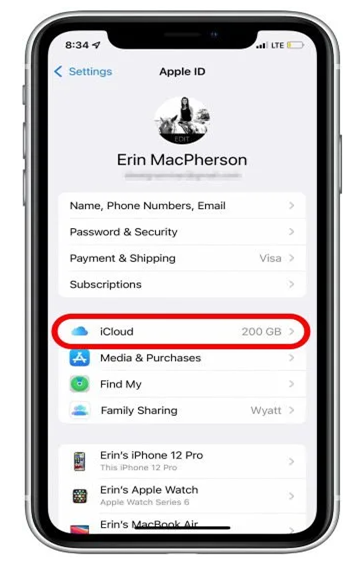
- Select iCloud.
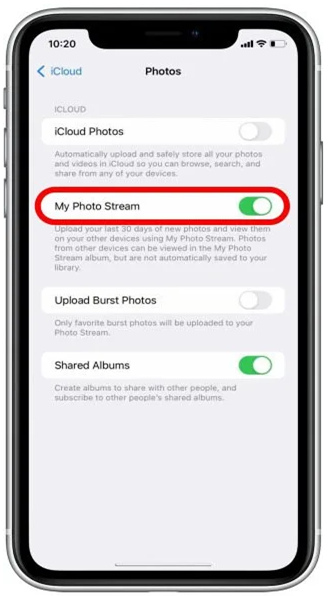
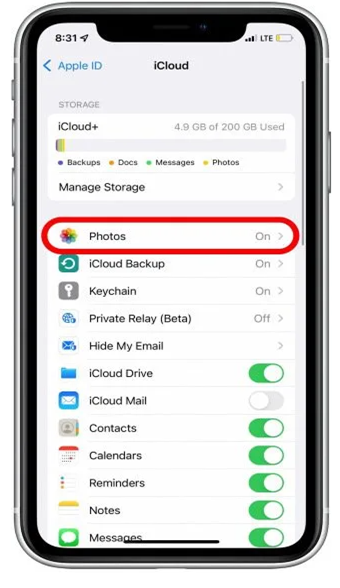
- Select Photos.
- Toggle on My Photo Stream.
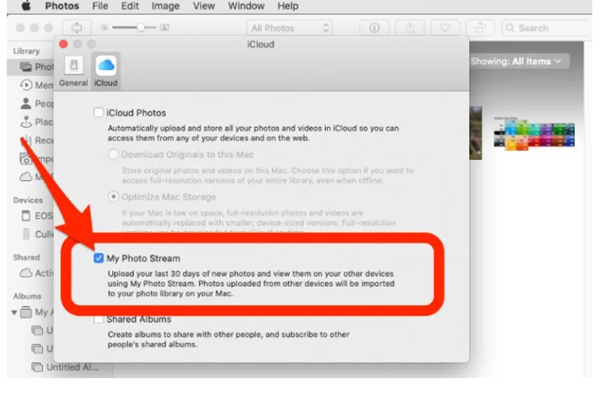
- Now open your laptop and go to the Photos App.
- Go to the Photos menu and choose Preferences.

- Select the iCloud tab.
- Check the box next to My Photo Stream. Press done.
- Now when you have the access to the internet, the pictures will automatically be downloaded to the Photo Stream.
How to set Photo Stream Images to automatically download to Mac or PC:
If you have macOS Cataline then you don’t have to go for a special method. The Photo Stream will automatically be downloaded in your Mac’s photo library. However, if you have macOS Mojave, go through these simple instructions.
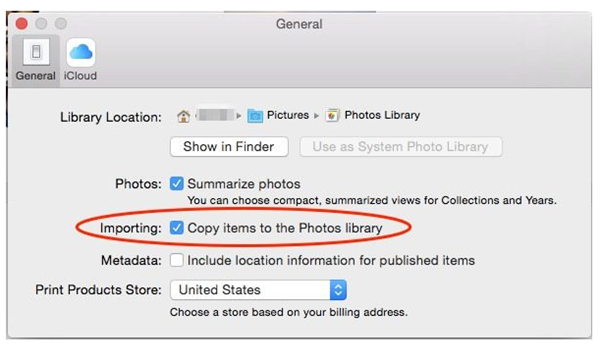
- Open the app.
- Pick the preferences from the top.
- Select General.
- Check the box placed next to Importing.
The photos will automatically leave the Photo Stream and get save to the computer. If you are using the paid version of the iCloud storage, then you can enable the iCloud Photo Library on the iPhone. This way the photos will be accessible online when you will not have the laptop with you.
How to download the photos from iPhone to the laptop with iCloud Photos:
This process is very similar to that of Photo Stream. Your pictures except the recent will get store in the iCloud account if you enable iCloud Photos. Your iCloud Storage can get easily fill up uncles you are paying Apple to have more space. This will cost you a penny, but you can effortlessly transfer the photos and even view them online as iCloud will keep the two libraries in perfect sync.
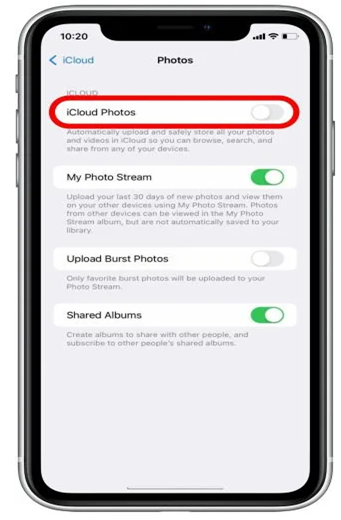
- Go to the settings app in your iPhone.
- Choose the Apple ID profile.
- Choose iCloud.
- Choose Photos.
- Toggle on iCloud Photos.
- Now open your Mac and go to the System Preference placed at the left corner of the screen.

- Sign into your Apple ID.
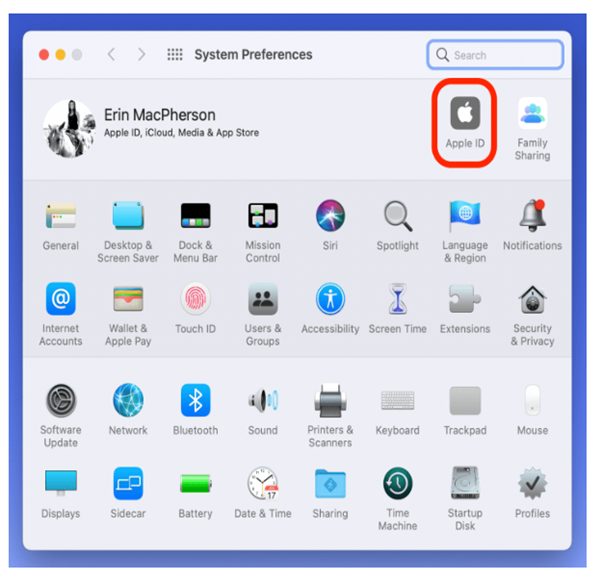
- Select the iCloud present on the left side of the menu.
- Check the box of Photos and enter the passcode.
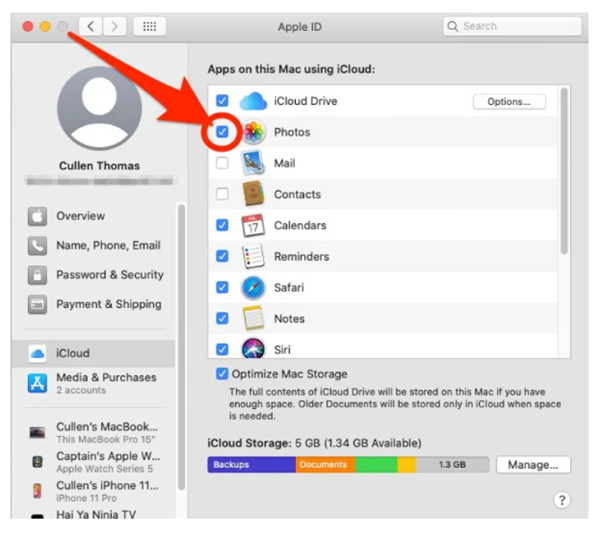
- Now all the pictures you will take will show up in both places.
Bottom line:
To cherish the memories, we try to capture every moment and scenery possible. It acquires a lot of space in our phones and sometimes even slows it down. Through these methods, you can even download the photos on your MacBook or even any cheap laptop you have. It will be that easy and won’t take a lot of your time. Your photos will be safe and you will be able to capture more and more without worrying about the iPhone’s storage.